A Calendar to rule all your Time Entries
- Sebastian Sieber

- Sep 17, 2025
- 7 min read
After the new mobile option for Time Entries in Project Operations, we have a closer look at yet another preview - the new calendar.
In this first look, we are going to explore the new, more intuitive calendar. fully integrated to your Microsoft Dynamics 365 Project Operations process and your Project Task Assignments.
Please note: As this is currently a preview feature, it is not meant to be enabled or enrolled in productive environments.
Dynamics 365 Project Operations Calendar
After enabling the new calendar experience throughout the Project Parameter, you will be greeted by the Calendar in the Sitemap of the Project Operations Model Driven App.
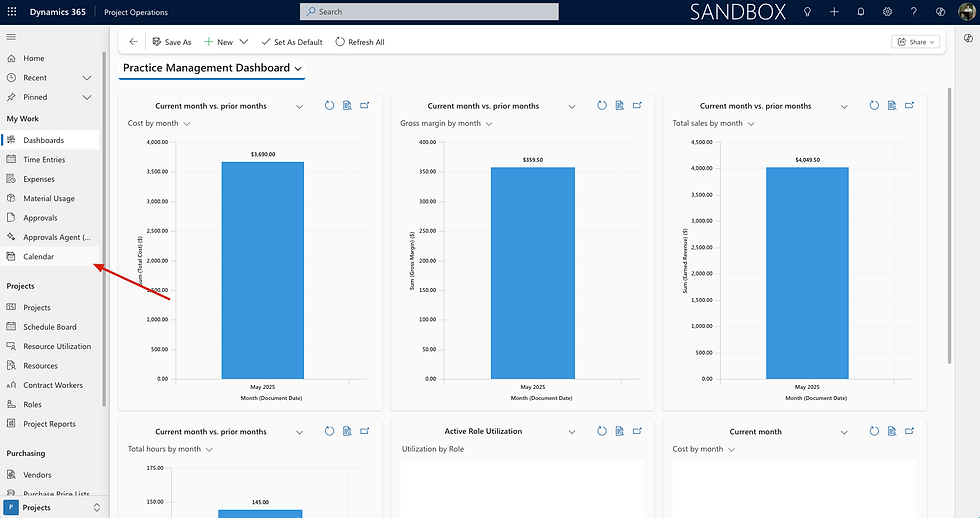
By accessing the calendar, each user will have access to their personal time entries. There is no exception or option to view time recordings of your colleagues, which is great for data security and privacy.
Application Features
Let's dive into all the different app features one by one. The great thing about the app is that it only adds value to the existing time recording capabilities without requiring an update on the existing process or even decision-making on which way to go forward for all employees. Actually, each and every team member can choose their personal preference for logging their times.
Create and Update Time Entries
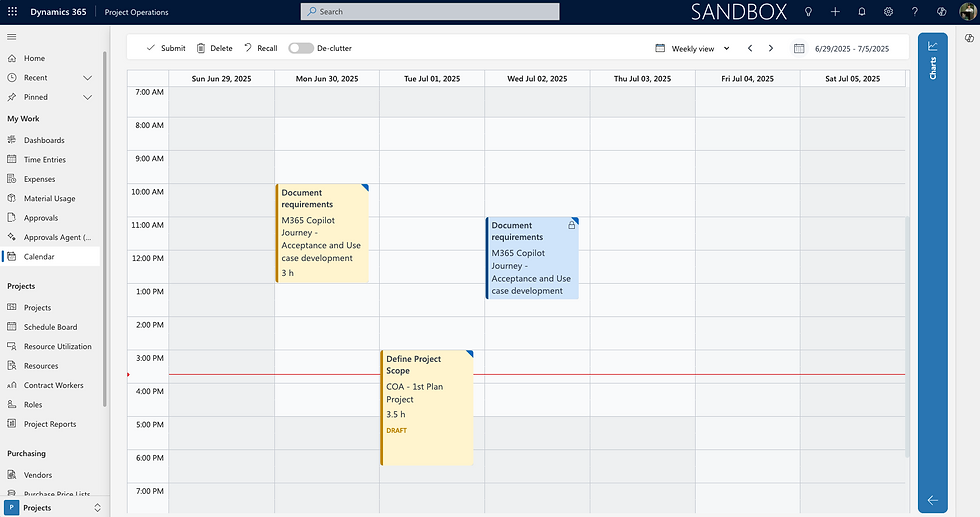
Starting with the obvious, you can actually create and update time entries. The biggest difference to the out of the box grid is that you can now carry start and end times with each new record.
This is especially useful in the European market, as by law, the duration only is not enough.
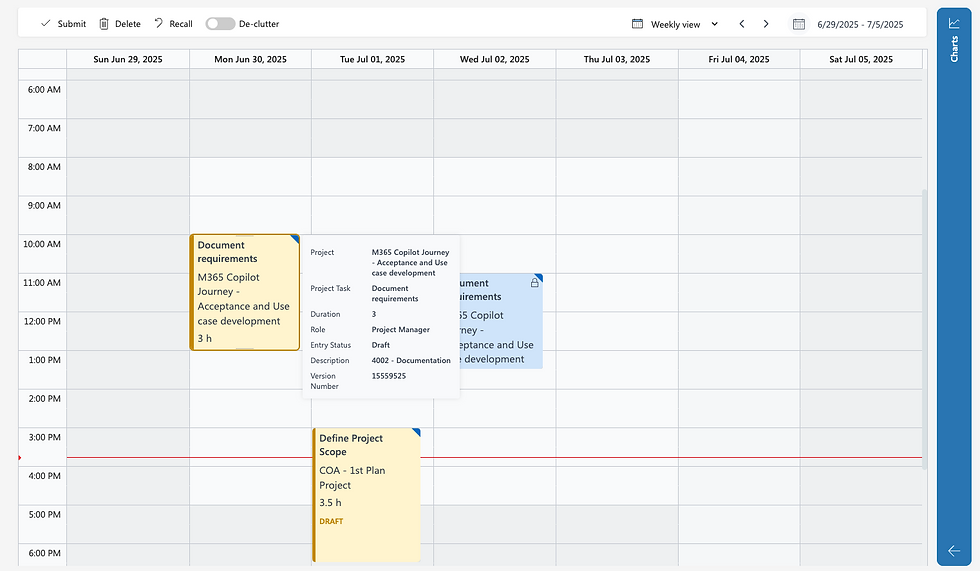
In order to create a new time entry, mark the time frame (start and end time) on the calendar with your left mouse.
Immediately after releasing the mouse, the creation dialog is displayed to fill in all necessary data.
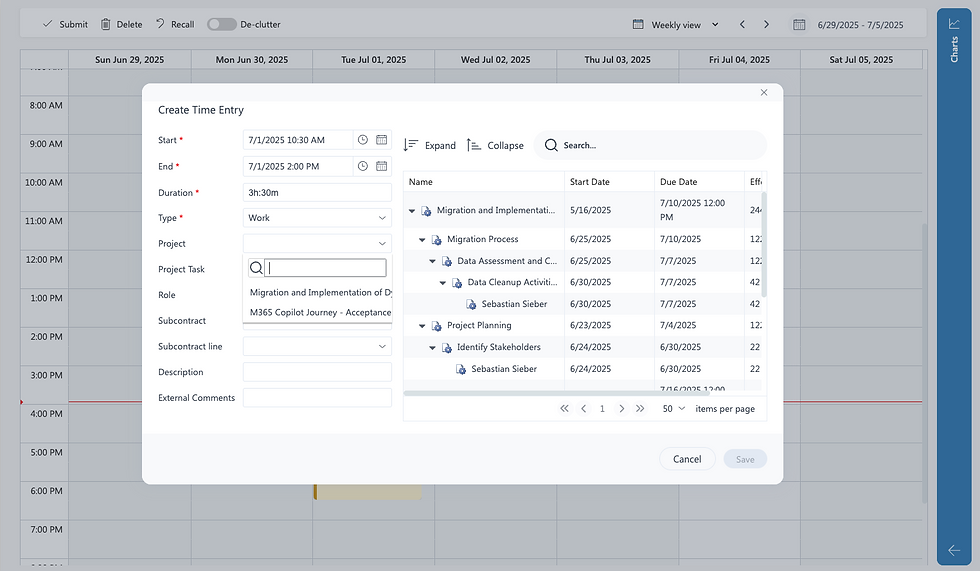
Very helpful is the Project Tree on the right - it shows all the different active assignments from a user's perspective. It is extended with a powerful search to find the desired Project quite fast. The nice thing is that you can use the "*" symbol to combine customer, project, or task names.
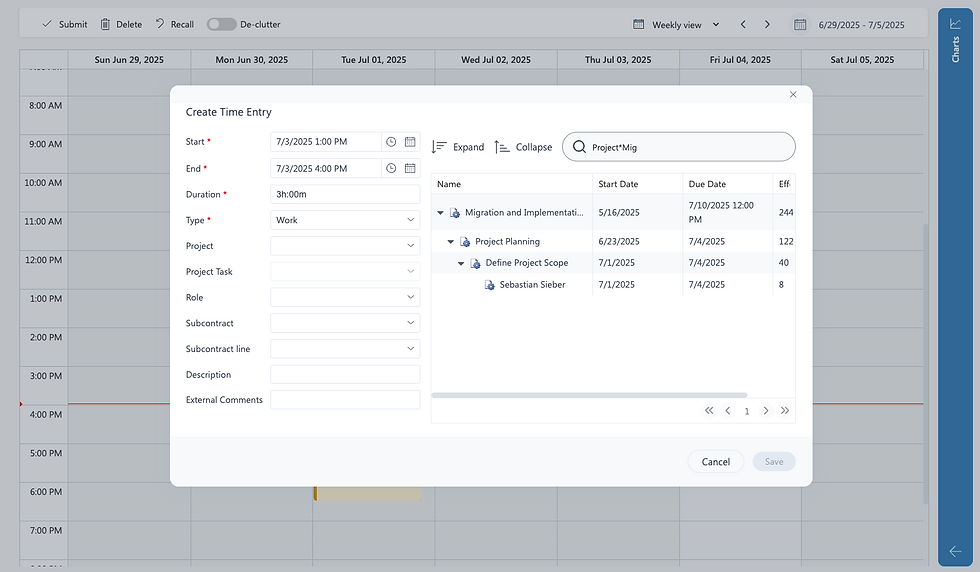
Practical example: I'm searching for the Development Task on the Contoso Project. I don't know the name the PM gave it, but I just finished my dev task. I can use Con*Dev to find the correct assignment immediately.
For updating the time entries, it is either possible to double-click on the existing record to make changes in the same creation form again. Right-click on the record to open the record inside the Model-Driven Application. Or, to change the time, it is possible to expand or shrink the time entry block itself by grabbing it by the end. Also, moving around to another time or day works seamlessly and intuitively by selecting the block and keeping your mouse clicked while moving.
Copy and Paste Time Entries
Besides creating and updating, users can also easily copy and paste existing time entries. Via CTRL + C and CTRL + V on Windows or command + C and command + V on macOS.
As soon as you copy an existing time entry the pasting option is active - this allows you even to create a copy with a different duration of the same activity - simply select the start and end time before hitting CTRL + V (command + V).


Copying is not prevented by the state of the time entry, the new time entry will be always generated in draft state.
Submit and Recall Time Entries
As all time entries are created in draft status, the application naturally supports submitting but also recalling submitted and approved records.
This is handled individually per record via the context menu of each time entry block or via the submit and recall options on the menu strip.

Track Absences
Besides project-related work, the users are also able to log absences, vacations, and overtime to cover all out-of-the-box and custom time entry types.
De-clutter Time Entries
Time recordings created in the grid view, or in general, without start and end times, are handled by the application as well. With the de-clutter option enabled, these time entries move to their creation time during the day instead of being pinned on the top of the screen at midnight.
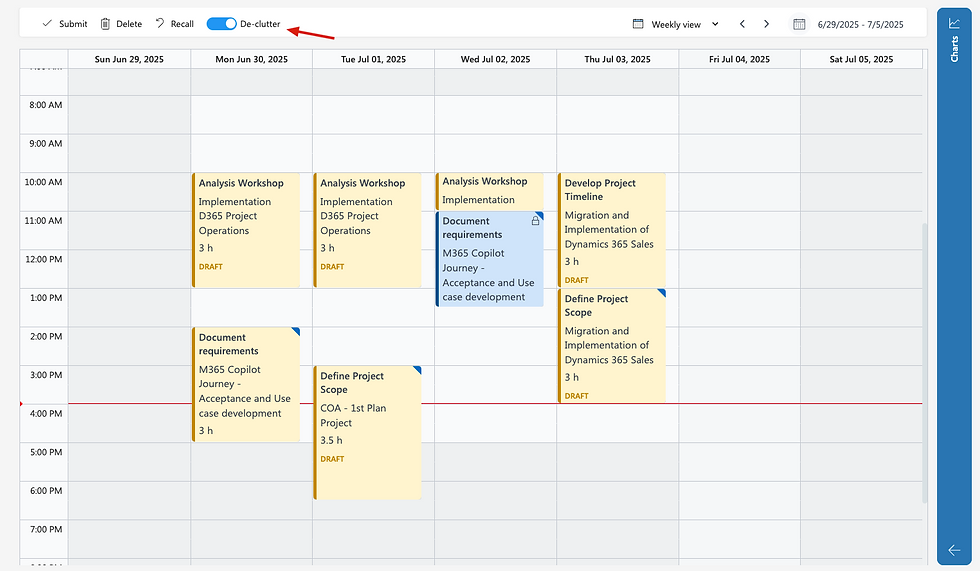
Still, I would recommend deciding on one time recording method. Either with or without time values to prevent confusion.
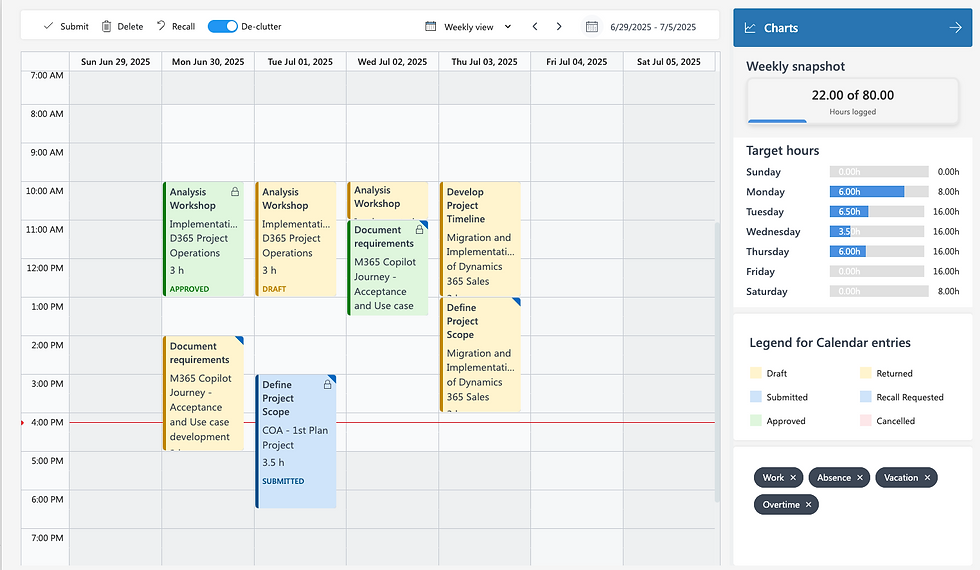
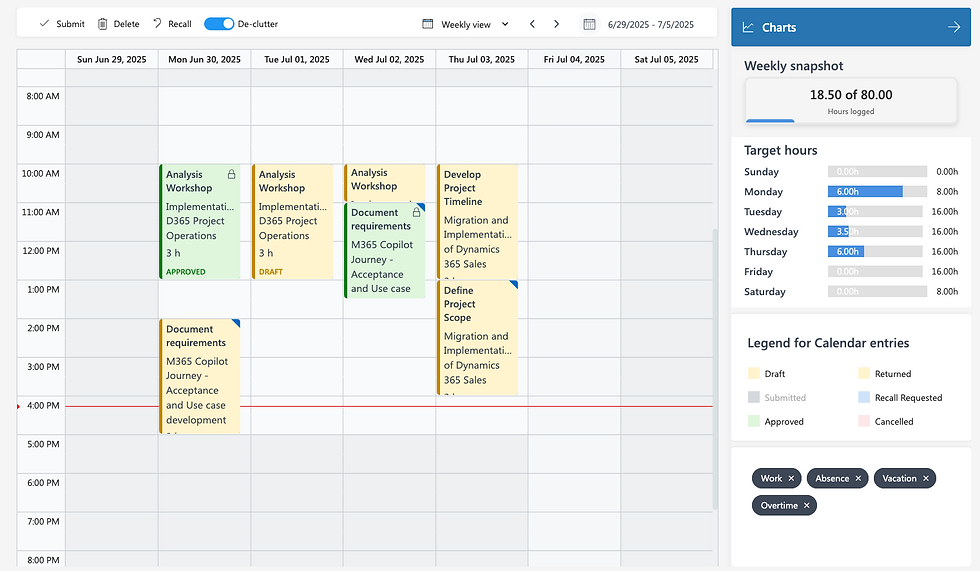
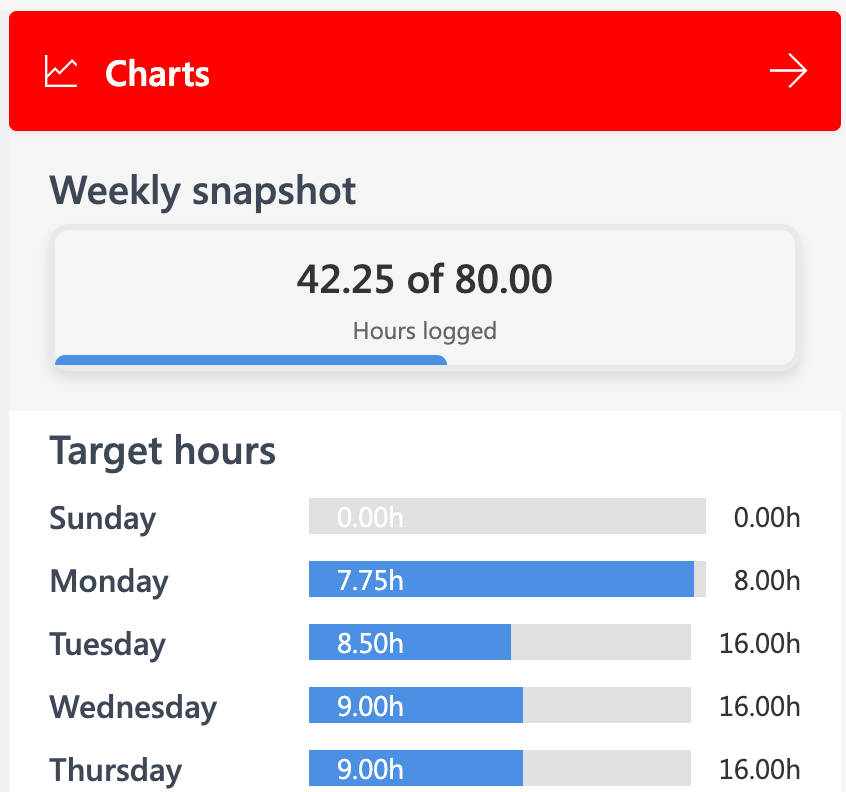
Work Time Insights
Pretty interesting from an end-user perspective might be the Charts pane on the right side of the Application. This tab shows additional insights about the target and actual working hours of the current view. In my case, I may need to have a call with my Manager as 80 hours weekly looks like quite a commitment.
Nevertheless, the application reads the data directly from the work hours of the bootable resource. Individual absences, part-time working models, or similar scenarios are perfectly covered while the employee indicates with a quick look how many hours are still left for the current week.

Filter and View Options
In addition to the work time overview, the Charts pane also includes the possibility to filter the calendar based on the time entry status, which acts as a color legend at the same time.
The second filter focuses on the type of time entries. As mentioned before, users have the option to not only book project-related services but also absences, overtime, and vacation.
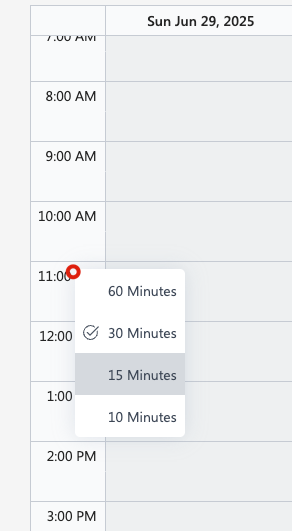
Besides date and view filters, the user also has the option to customize the scale of the cells in the calendar. With a right-click on the time scale on the left, the user can individually choose from a pre-defined set of units. The setting will be stored individually for each user, similar to the chosen view, to greet them on the next app launch without the need to apply preferences each time.
Customization Options
The new calendar control also offers a set of customization options to optimize the needs of each organization.
Visual Appearance
First of all, let‘s start with the appealing interface. It already looks quite modern and fits well in the current Dynamics 365 styling. However it is also customizable. At least the colors. With the help of Environment Variables it is possible to bring e.g. the corporate identity into the application.
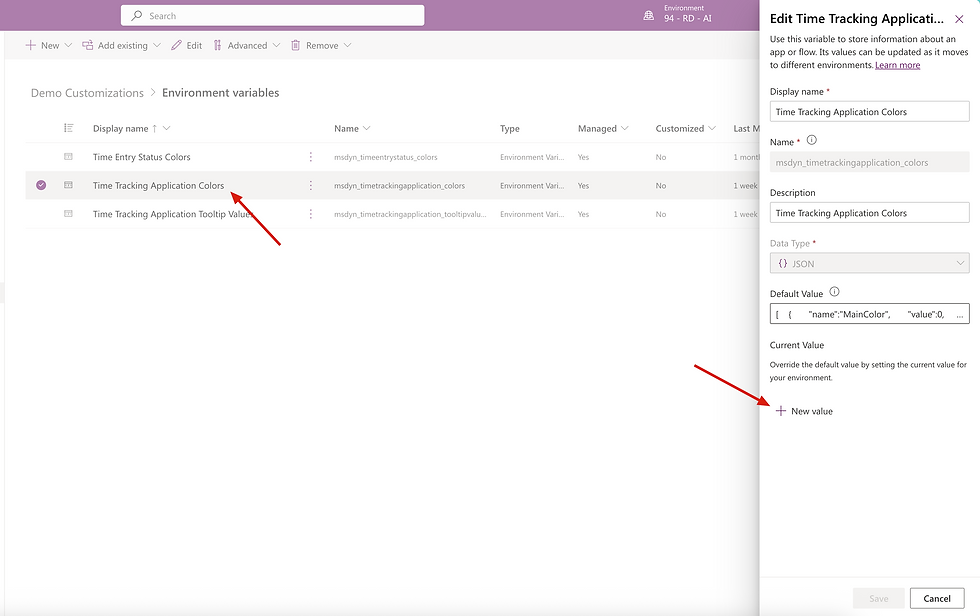
Changing the main color of the application will apply to the charts panel and certain highlights across the app. Select the Environment Variable "Time Tracking Application Colors" and add it to your solution of choice.
In the menu on the right, you can find the current default value and the option to add a new value. In order to keep the default setting alive, I highly recommend creating a new value here.
Solution deployments have two options for custom values: include or exclude - so based on the deployment scenario, you have the choice to keep the original value in the target environment.
All values for the Time Tracking Calendar Application are in a JSON format. For the Application colors it looks like this:
[
{
"name": "MainColor",
"value": 0,
"color": "#2975B2"
},
{
"name": "SideColor",
"value": 1,
"color": "#47505E"
}
]
For now, only the MainColor is handled. The SideColor is not in use yet. Perhaps something for future releases. Updating the MainColor attribute, to for example red, it will color the chart banner in the given color:
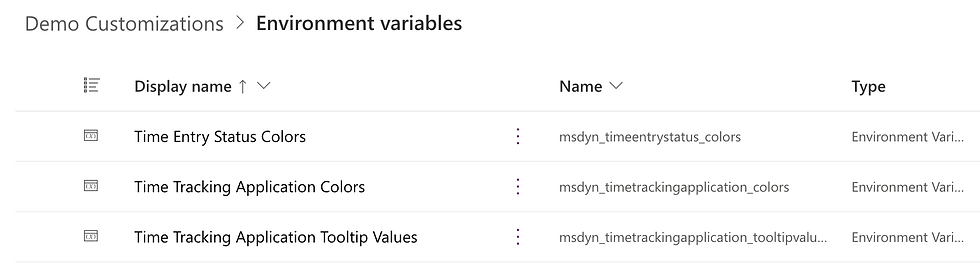
But the colorful experience doesn‘t stop here. Also the colors of the different time entry states, Draft, Submitted, Approved, Returned, Recall Requested, and Cancelled can be adjusted in the same manner with the Environment Variable "Time Entry Status Colors" to fit the overall look and feel of the visual representation of the calendar.
The default JSON maintains the same syntax as for the application colors, just adding more options for each time entry status:
[
{
"name": "Cancelled",
"value": 192354320,
"color": "#A80000",
"border": "#945C19"
},
{
"name": "Draft",
"value": 192350000,
"color": "#C48703",
"border": "#1d2519"
},
{
"name": "Returned",
"value": 192350001,
"color": "#A80000",
"border": "#AA8B19"
},
{
"name": "Approved",
"value": 192350002,
"color": "#107C10",
"border": "#461F99"
},
{
"name": "Submitted",
"value": 192350003,
"color": "#107C10",
"border": "#13846F"
},
{
"name": "Recall Requested",
"value": 192350004,
"color": "#C48703",
"border": "#2E5FA9"
}
]
Set the new color hex code with the desired color for the related time entry status, and save the new value to the Environment Variable.
A nice attention here is the additional option to color the border around a time entry block. The border is shown once the user selects a block. For a matching appearance, a slightly darker value should do the job.
Custom time entry status values are also supported.
Forms
Usually, most of the customer implementations include any sort of custom fields or tables. This is often the case also for their time recording. The desire is to keep related efforts as small as possible.
To maintain custom values during the time entry creation in the Time Tracking Application, the app has a unique feature. The creation dialog is dynamic. On load of the application, the Time Entry quick create form is extracted and all the fields are overtaken. This includes all sorts of types, including table lookups.
That also ensures having the same experience and values maintained no matter what is the preferred time entry creation method.

Customize the quick create form of the Time Entry table in order to show or hide the fields of your choice. Or just change the order.
In case there are multiple quick create forms in your environment, check which form is used in model driven app, respectively how the form order looks. The app considers the highest form in the order which is part of the model driven app.
JavaScript or Business Rule related functionality is excluded from this feature.
Tooltip
You may have already recognised it. There is one Environment Variable we haven't spoken about yet. Let's change that - Time Tracking Application Tooltip Values.

The tooltip shows up once you hover over the time entry block. Especially for a smaller entries the tooltip is a great option to display more information. The tooltip can also show field information that is not part of the creation form. For example, information that gets automatically set in the background.
In order to customize the tooltip to the organizational needs, the Environment Variable Time Tracking Application Tooltip Values can be extended with the schema names of the Time Entry field that should be shown:
{
"values": [
"versionnumber",
"statecode"
]
}
The default values contain information for the Version Number and the Time Entry Status. While the Version Number doesn't offer the best value, it's nice to simply add the Status besides the color indicator.
Conclusion
The new Time Tracking Calendar App delivers a strong first impression, offering immediate value for time-based service recording. While its current scope focuses on Resource Assignments, upcoming iterations promise broader functionality for project teams.
For organisations where precise start-and-stop tracking is critical, this tool provides actionable insights, enhanced by intuitive filtering, copy-paste efficiency, and extensibility.
Its sleek design already impresses, and with GA enhancements scheduled for the end of September, the experience will only improve.

Hi Sebastian,
Thank you for sharing this great post!
I have a related question:Is there any feature (that I might have overlooked) to create time entries in draft mode based on task assignments or resource bookings?
Thanks a lot for your insights